If you are DIY (do-it-yourself) oriented, you might decide to build your own desktop computer that meets your needs whether it's for the purpose of work or entertainment (gaming pc). Regardless, If you decide to go the DIY route, here are few tips that will help you accomplish it successfully.
Computer Case
 |
| Computer case |
The computer case (chassis) is one major thing that will determine the life span of your PC, a poorly designed case will not allow adequate air flow in and out of the computer and thereby resulting to overheating and eventually the damage of the computer. It is recommended that when buying a computer case for a new build, you choose a well-designed computer case with proper air vents and preferably a 120mm rear end fan for moving the hot air out of the PC.
Component mounting
 |
| Mounting a hard drive |
When mounting components such as optical drives and hard drives, be sure to use the screws that comes with the case for these components in order to have a solid mount, it is advisable not to use the plastic/mechanical locks for this components which you find in most computer cases as they tend to move especially during transport/shipping of the computer.
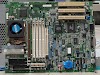
Motherboard
 |
| Standoffs screwed in place |
The motherboard is where every other component making up the computer connects to, so if something goes wrong with the motherboard, the computer may be partially or completely damaged. When mounting the motherboard to the computer case, be sure to use the standoffs (screw holders) that come in the screw box for the case. Some computer case already have this screwed in place, you just have to modify the position to suit your motherboard screw holes. The purpose of the standoff is to prevent a short circuit from occurring in the motherboard as a result of contact with the metallic chassis.
Processor
 |
| Applying thermal paste |
When mounting the heat sink on the processor, a thermal paste is required in-between the contact surface, this provides a means for proper heat transfer from the processor to the heat sink for dissipation out of the computer.
Cooling Fans
 |
| Cooling fan |
It is not a good practice to connect the entire computer case fan to the motherboard as they tend to consume more power. The important computer cooling fans to connect are the heat sink fan, the front end fan and the rear end fan, in most situations the front end fan is only required when you have more than one hard drive installed otherwise the heat sink and rear fans are adequate to ensure proper cooling of the computer.
USB and SATA ports
 |
| SATA ports |
 |
| USB port |
Newer motherboards come with the latest versions of the serial data ports, you will find on newer motherboards USB version 3.0 in addition with the version 2.0 ports also SATA 6G (SATA 6Gb/s) in addition with the SATA 3G (SATA 3Gb/s) ports, this newer interfaces i.e USB 3.0 and SATA 6G have higher speeds than the older ones, so it is recommended you connect your devices first to this new faster ports and any extra device to the old ports.
Note: It is worth noting that static electricity can do a great damage to computer components; it is advisable not to build your computer near any object or environment that can produce static electricity . Use antistatic wrist strap, if not available use the traditional method where you frequently touch the computer chassis to dissipate the static electricity from your body to ground before working with any of the components. Also make sure to use plastic wire ties to properly organize the cables in order to allow free air flow in and out of the computer case.
Also,
before buying the components to build your desktop PC, you have to do a research to know the particular components that will meet your requirements and can also be compatible with your motherboard.
These are just a few tips, you can contribute or ask questions through comments.


0 Comments
Share your thoughts!