


Before getting a new or replacement motherboard for your computer, firstly you have to decide on the features you want to add or replace in the computer.The planning process begins with choosing the motherboard you need for your requirements which may be based on speed, larger memory support, additional ports and future upgradability. Also the size of the motherboard matters as it must match the case type used whether ATX, micro ATX, BTX or micro BTX according to your requirement or for an existing computer case when you need to get a replacement motherboard. Also factors such as noise and power requirements can be a consideration as smaller computer cases tend to produce more noise but use less power.
 |
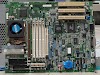
| ATX and BTX Motherboard |
Selecting a Motherboard
Speed: In terms of speed, there are many processor options which will depend on the type of motherboard selected as some motherboards support high end processors and others can take two processors and so on.
Memory: In terms of memory, some motherboard can support higher end memory while others cannot.
In-built features: Some motherboards have the necessary in-built features such as graphics, audio, multiple interfaces and expansion slots and may not require any additional third party interface.
Case Selection

As said earlier, the case must be a match with the motherboard type whether ATX, micro ATX, BTX, micro BTX.
The case selection can be based on its purpose. For example you may want a case with neon lights for a gaming computer. Also if considering any future upgradability, you may need a larger case for the extra component additions you may do in future.
Installing the Motherboard
Before installing the motherboard in the computer case, first install all its components e.g. processors, heat sink and fans, memory etc.
The next step is to prepare the computer case for the installation, install the standoffs in the correct location that matches the motherboard screw holes.
 |
| Standoffs installed in the computer case |
Note: The purpose of the standoff is to avoid any physical contact of the motherboard with the case; this prevents a short circuit occurring between components which can cause damage to the motherboard.
After a proper installation of the motherboard, make sure all the connectors for the various accessories such as light, button, power supply etc. are in the right order.
Try as much as possible to keep the cables tidy enough using zip ties in order to allow proper air flow in and out of the computer case.
 |
| Keep the wires tidy with zip ties |
Testing: Plug in a keyboard and monitor and turn on the computer to see if everything works fine. Also listen for beeps which could be error codes.
Troubleshooting a Motherboard
When troubleshooting a motherboard for issues, try as much as possible to isolate the various components such as processor, memory, hard drive, power supply etc. as the problem could be as a result of one or more bad component.
There are available tools that can be used for diagnostic purposes, they could be a manufacturer or a third party tools and can be used to test hard drives, memory etc.
Problems can occur as a result of overheating, Bios incompatibility or failing hardware. Do a hardware swap to ascertain if a problem is caused by a particular hardware. Sometimes just upgrading the BIOS can fix a motherboard issue.
Note: When carryout a BIOS upgrade, avoid any situation that can cause an interruption to the upgrade as it will lead to damage of your system.
This are few tips for installing and troubleshooting computer motherboards.
Do you have any question or contribution? Let's hear it in the comment section.


0 Comments
Share your thoughts!